.png)
SaED Week 3: Towers and Creeps Implementation
- dylanknipe456
- May 22, 2021
- 7 min read
Updated: May 23, 2021
22/03/21

Towers

Initial statistics for each tower. Will be compared to the final statistics in the final week.
Arbalest

This is the most basic of all the towers and the one that players will most likely use first. It fires projectiles, which cause an average level of damage, and it is the cheapest of all the towers. The arbalest can be upgraded on two occasions, with each upgrade being more expensive than the previous one. The upgrades are pretty basic also, delivering more damage in turn for a greater fire rate delay. Starting off, players should be able to place 3 or 4 of these to deal with the relatively easy starting waves. This is the slowest of all the towers and is mainly intended to start the players with a decent tower, before the players progress and experiment with the more unique towers. The upgraded versions have the potential to deliver the highest amount of damage in the game, but the cost may be too high for some to take the risk. I do not want players to shy away from investing a lot into a tower, but at the same time, the tower must be worth the investment in order to be alluring for players to use at all.
Arrow

Another fairly basic tower. The arrow tower fires relatively weak projectiles but makes up with it by having a rapid firing rate. I wanted to use this tower to teach players the potential of upgrading and how it can be worth the time and resources. The upgraded versions of this tower, while expensive, increase the firing rate of the arrows exponentially, therefore being able to take out some of the weaker creeps very easily. It is not as effective on heavier creeps with more hit points (HP), but for the early creep fodder at the beginning of each wave, it is invaluable. Players should place these towers near the beginning and end of the level as the basic and fast creeps have low HP and should be dealt with immediately. This is especially important near the end, as speed creeps can reach the end very easily, therefore they should be picked off with arrows if they manage to survive near the end.
Flame

The flame tower fires a continuous line of damage. The potential this tower can bring is not immediately apparent. The fire causes decent damage, but its radius is pretty much non-existent as it does not target enemies at all. Damage is delivered whenever creeps enter its line of flame. This tower shines in destroying slower creeps, for example the heavy and doll creeps, because they have a slow walk speed and the amount of time that they spend within the tower’s flames is much longer than that of its faster brethren. This is worse for the doll creeps as the smaller versions, which spawn whenever the main one is destroyed, can all be caught in its line of fire at once. This, therefore, delivers about three times the damage in comparison to another tower, which only targets one creep at a time. The upgraded version of this tower increases the thickness of the flame, forcing creeps to walk through it for even longer.
Splash
The splash tower is similar to the arbalest in almost every way with one important distinction, it does splash damage. This tower can be quite expensive as it can deliver severe damage with a single shot. The main usage for this tower was to take out buffer creeps as quickly as possible. Since buffers tend to stay very close to other creeps to make them tougher or faster, the splash tower intends to destroy them and anything else around it as quickly as possible. The downside to this tower is that it has the slowest firing rate in the game, but I feel that the damage it spreads balances it out. The upgraded version increases the splash damage even further, covering a wider radius.
Frost

Frost towers are the only towers in the game that do not cause any damage, but rather act as a way for players to have better control of the level. Whenever creeps enter its radius, it slows them down. The frost tower is a great companion piece with all the other towers in the game and is intended to teach players about tower synergy. For example, placing the frost tower next to a flame tower will increase the amount of time a creep is within the flame tower’s fire, dealing severe damage. This is a very powerful effect, but is balanced by the fact that it requires the presence of another tower type to reach its maximum potential.
Electric

Electric towers are similar to the frost towers in that they deliver minimal damage, but they string together all creeps within their radius. This can be synergised well with the splash tower, due to all the creeps being so close together, and the splash damage that is delivered will be spread as wide as possible, therefore allowing significant damage to be done to each creep. Again, this tower is created to teach the players about combinations with other towers and it can only be fully utilised when used in conjunction with other towers. Because of this, both the frost and electric towers are the cheapest towers in the game, but their low cost can be used to the players’ advantage when implemented correctly.
Creeps

Initial statistics for each creep. Will be compared to the final statistics in the final week.
Basic

This the first creep players will encounter as they encapsulate the entire first wave alone. As expected, this creep has average statistics across the board and does nothing exciting. Together, they are mainly just used as fodder so players can experiment and get familiar with their towers before the deadlier creeps enter the level. These creeps are not to be underestimated, however, as they are easily the most common creep and can arrive in huge numbers at once. If players are not careful, they can become quickly overwhelmed with the number of them moving at any one time.
Speed

These creeps are tiny and do not have much HP but are extremely fast and can reach the end of the stage very easily. These creeps are designed to keep players on their toes. For example, if players are too busy focusing on delivering as much damage as possible to slower and more powerful enemies, then speed creeps can quickly dash through all the confusion and reach the end quickly, losing the players one life. They are set up in a way so that players do not pile all their towers up at the beginning and middle of the stage. It is important to spread the towers evenly and effectively.
Heavy

The opposite of speed creeps. Heavy creeps are very slow but are tough to take down due to their massive HP statistic. These creeps are designed to draw the players attention to them, due to their stature and imposing nature. They can quickly take the focus of players’ towers away from other creeps, allowing them to continue onward unscathed. The goal for the players is to deal with them quickly and efficiently so they can go back and focus on the rest of the wave. It is unlikely that a heavy can reach the end of the level, so it might also be advantageous for players to quickly deal with everything around it, so they can fully focus all their fire power on the heavy when itis near the end of the stage.
Portal

Unique creeps that have the same statistics as basic creeps but have the ability to teleport. These creeps have their own spawners, which they can crawl into near the start of the level and exit near the end of the level. If left unchecked, these creeps can quickly take the players’ lives. Similar to speed creeps, this is intended to teach players to evenly scatter their towers throughout the level. These creeps are quite rare and should not bother the players too much but will usually spawn when players least expect it. This is usually in tow with the heavy creep in order to draw players’ attention to it, allowing portal creeps to sneakily take some of the players’ lives.
Buffers
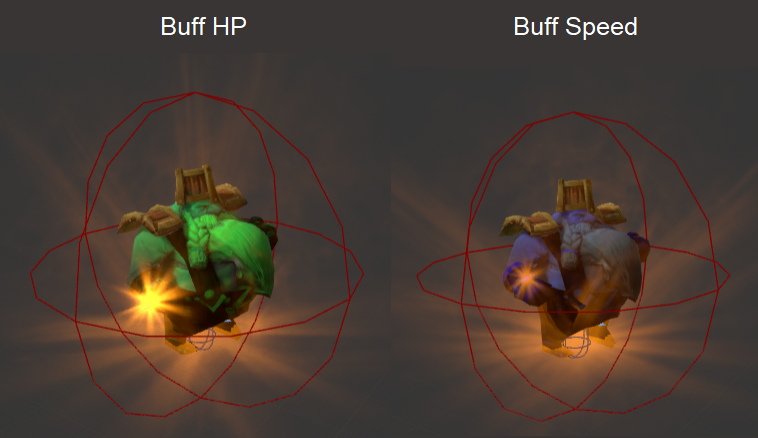
These creeps buff the statistics of any other creeps that surround them. The green one increases their maximum HP, while the blue one increases their maximum walk speed. They are deadly when combined together at once but, luckily for the players, they do not have much HP of their own to spare. These creeps are intended to make the other creeps overall more powerful but akin to towers such as frost and electric, these creeps can only be fully realised when in combination with other creeps. By themselves, these creeps are essentially useless which is their weakness. Like the towers previously mentioned, these towers are intended to teach players about synergy within creeps and how certain creeps can become even more deadly with their inclusion. For example, the heavy creep gaining even more HP or the speed creep becoming even faster.
Dolls

These are another rare series of creeps that may look harmless at first glance but extremely punishable if not dealt with correctly. These creeps have very low HP, however, they make it up with the fact that when the main one dies, between three and five more take its place. The best way for players to combat the dolls is to keep them frozen near a frost tower and quickly pick them off from there. They are mainly used as a way to keep players’ eyes constantly focused, as on some occasions during gameplay, there are many creeps charging at once, with a doll coming along to make that situation even worse. They are balanced in a way that makes the extra creeps, which are spawned, become very frail and slow. These creeps can seem very overpowered but are uncommon enough that players will not have to worry about them too much.
Boss

Intended to be the final challenge for players, the boss creep takes all the elements of previous creeps and combines them together to create the greatest foe in the game. Massive and beyond imposing, the boss creep spawns in, with both buff creeps at its side, and has even more HP than the heavy creep, however its walk speed is that of the basic creep. Players must use the right combination of all towers at their disposal, if they hope to take down the boss. The boss is used to teach players, for the very last time, about the usefulness of everything they can make within the game and to see if their strategies have finally paid dividends.

Comments